Friday, April 27, 2018

My Block 4 is Wrong! But I'm Okay

So, I did it wrong on both blocks!
Can you see my mess up?
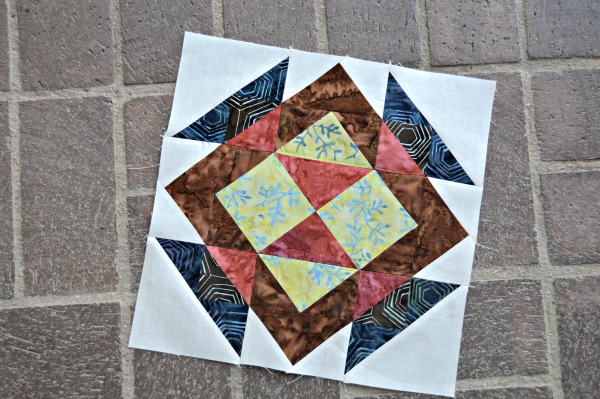
Yep, I mixed up the Quarter Square Triangles.
And,
I left them just like that!

I bet you never even noticed in my finished quilt.
That's why I left them.

I want you to know that some mistakes are okay.
In my mind this was wasn't worth the seam ripper.

Look, I make lots of mistakes!
I bought myself a fabulous seam ripper (or 2).
Why, you say?
Well, when you use a seam ripper as much as I do,
you might as well have a lovely one!

Want to see them?
Of course you do...
I keep one by my sewing machine and one in the long arm room.
Both get plenty of use.

Oh, by the way, I have some Wool Pressing Mats to sell over on my website.  I talked about them in the Block 3 post.
I just need to adjust the shipping charges as I figure out what shipping will really cost.


Let me get back to the task at hand.
The making of Block 4.
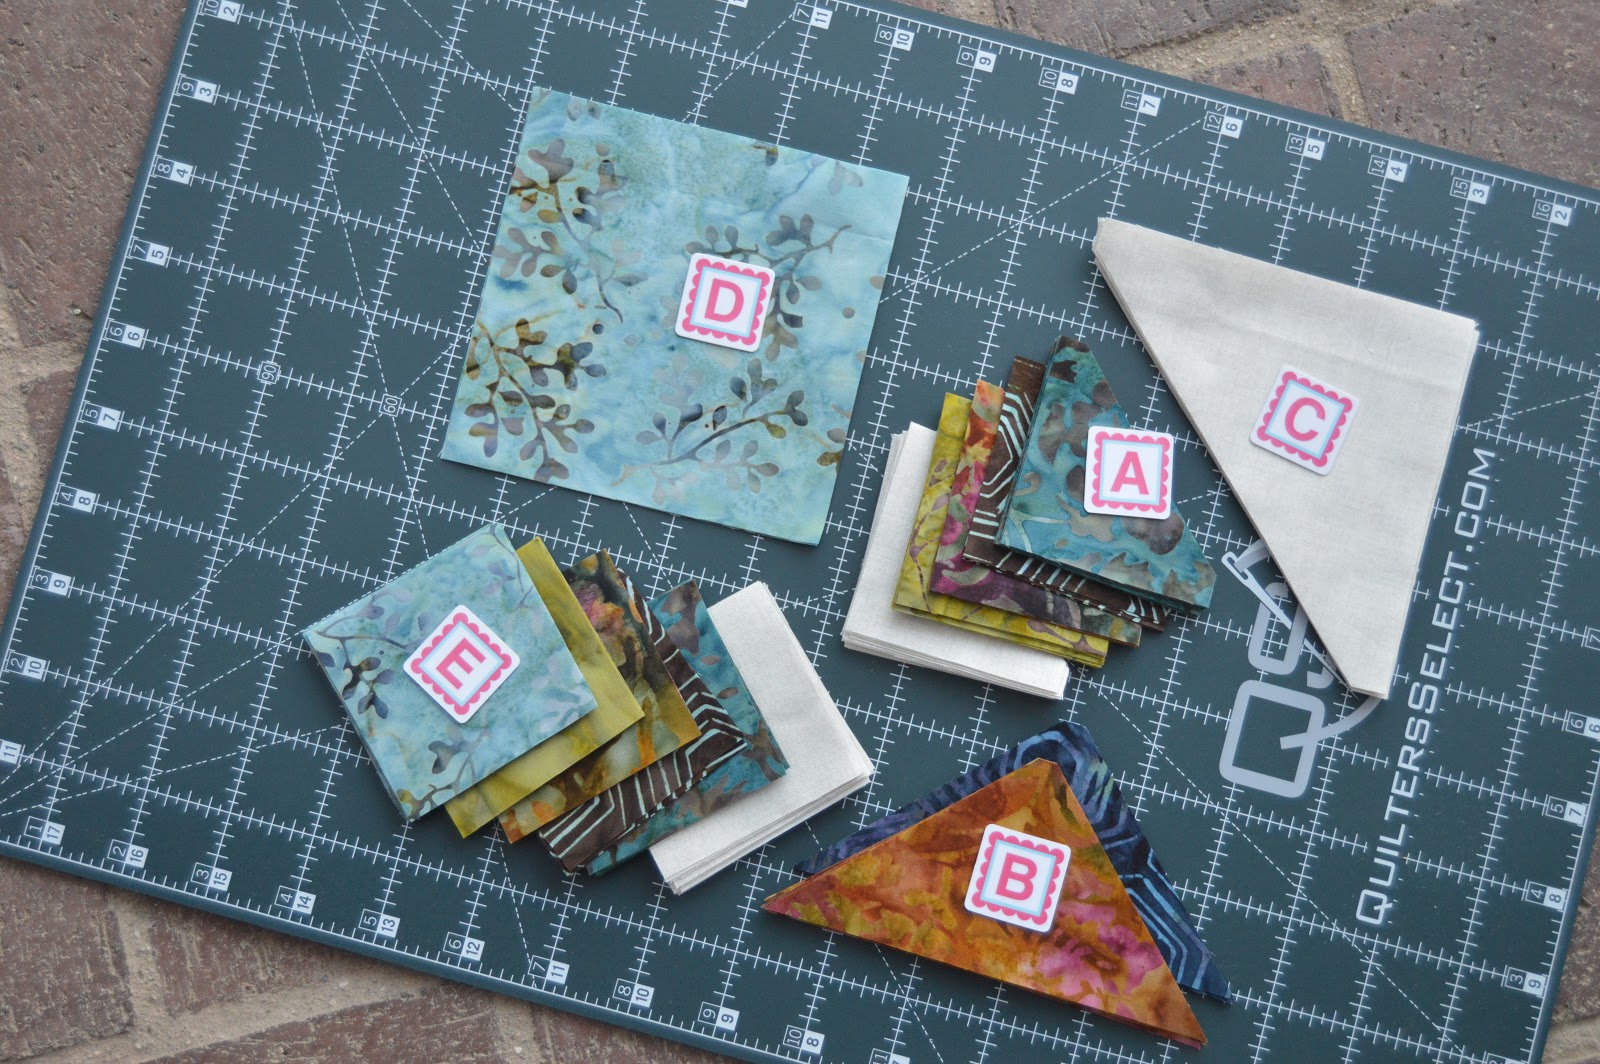
Everything started out just fine.
I cut and labeled my pieces as usual.

But, then something happened.
I layed out my pieces without consulting the pattern
(cuz, I know what I'm doing, right?)

NOPE!

Look at that...
I designed a new color lay-out for this block, ha ha.

Have you ever heard someone refer to that kind of mistake as a new design element?
Well, if not, I want to inform you that I have created a new design element for Block 4.
I crack myself up, can you tell?

Anyway, I finished my blocks and my Let's Work Ahead units.


Oh, and I thought you needed another up close view of Scott's fabulous quilting.
So, here you go...

Gosh, I hope you are having as much fun with this Quilt Along as I am.

Until next week,
Blog at you later,
Tiffany


Friday, April 20, 2018

Batik Block 3 - Easy-Peasy!

Why Easy-Peasy?
Because the Batik Block 3 does not use directional fabric!

Don't get me wrong, the directional fabrics look really cool!
But, when you don't use them you don't have to worry about them!

I am pretty consistent in my work process,
first I cut and label!

Next, I assemble units.


Then I put those units together.
Your getting the hang of this, right?


I always do the Work Ahead steps!


Now let me share with you how I get my blocks so flat!

I just started using a Wool Pressing Mat and I am in LOVE!
The mat maintains the heat and the pieces you press just seem like the press faster and better.

When I am assembling the units I like to use Flatter!

There are different scents (I like them all).
The Flatter helps me to give the units a bit of crispness without the use of starch.

I do use the Best Press when I get the block assembled.
I give it a good pressing so it is nice and pretty and ready for the next step.


The next step for me is the design board.
I love having a big design board where I can audition my quilt blocks and sashings and such.

Please check with your local Quilt Store for any of the items I have listed that you may be interested in.
Please help keep your local Quilt Store in business.

I am selfish and want the local stores to stay open so that when I travel the country I can try to visit them all!

Besides, I am sure they want to stay open as well.

Until next week....

Blog at you later,
Tiffany


Friday, April 13, 2018

Holy Moly - It's block 2!

Where does the time go?
As I get older the days and weeks and months just fly by!
I try to slow down and enjoy each and everyday, but sometimes I forget to do that.

Well, I guess I should get on to the business at hand...
Block 2

So, I love batiks!
Always have, since the moment I first saw them.

I love the tight weave of the fabric,
the vibrant colors from the dying process.
Some day I would love to own a batik chop or 20.
(that's what they call the item that is used to apply the wax in the batik-ing process).

Wouldn't it be great to go to Bali and watch the entire process?
I sure think so!

You know what else I would really like to do?
Design my own batik line and then get to keep the chops.
A girl can dream, right?

Okay, back to the task at hand...
the other thing that is great about batiks is that the right side and wrong side are usually so similar that it doesn't matter which side of the fabric you use!
What a bonus!

Here are my pieces all cut, labeled and ready for Block 2.

Just like last week, I have worked in units.
Do you remember that I like to press my seams open?

Well, when you press open you also need to pin.
I didn't used to be a pinner, but when the end result is so much better, it is worth the time and effort to me.


Assemble those units into rows and the rows into blocks.
Make sure you post your pictures to Facebook or Instagram, you know Nancy and Sarah have some great prizes to give out.  Use the hashtag #DesignerDuoQAL
You don't want to miss out on that.
Besides, that will be incentive to keep caught up.

Oh, don't forget to do the Work Ahead units!


I am off to share 50+ quilts and a Trunk Show tonight!
I do love to share and teach.
Hit me up if your Guild needs a guest.

Blog at you later,
Tiffany

P.S. I will be checking the hashtag and keeping an eye on all your progress.


Friday, April 6, 2018

Designer Duo Quilt Along: Week #1--April 6 Fabric Selection & Block One

Hello! and Welcome!

I am Tiffany and here is my version of the Kaleidoscope Quilt
which is the subject of the Designer Duo Quilt Along!

Batiks are my favorite, so when Nancy Rink (one of my favorite quilters) asked me to join in as a guest to the Quilt Along, I chose these beautiful fabrics by Laundry Basket Quilts of Andover Fabrics (where some more of my favorite quilt friends work).

Daryl helped me with the fabric choices and Giuseppe photographed the quilt for me when we met up at QuiltCon in Pasadena last February.

Let's just say:
Quilt Friends are Awesome!

Here are my fabrics:


If these are just calling your name, head over to my website and see if there is still a kit available.

I might have some pattern books if you want to choose your own fabrics:

Shall we start in with Block 1?

First things first...I cut all my background pieces.
If you are using a ruler or tool that is new to you, I suggest that you cut some sample pieces and make sure that your cutting and piecing works out before going on to cut all your background fabric for the quilt.

If you are using The Goddess Tool, let me suggest a couple of videos for you:


(this video is for a block that is made up of Tall Triangle Units, you will understand if you watch)


I make sure to label all my pieces
(keeps me from wasting time later).
These cute little letters are called:


I stitched together my units and pressed my seams open
(I know, I know you think I'm crazy).
Well, just look below at how nice it is to stitch right at the tip of the triangle point!

Next I put those units together.
Just look at that back!
Make sure you construct two of Block 1.

Oh, make sure you do the "Work Ahead" units.
Let me tell you, you will be happy later!


Just like that, Block 1 is complete!

I shall put in a shameless plug right now.
My husband, Scott, digitized the machine quilting design
and actually quilted this quilt!
No. You cannot have him!

Okay, that was awesome!
Please let me know what you think of my block!

Blog at you later,
Tiffany


Wednesday, April 4, 2018

Designer Duo Quilt Along is Starting Soon!

Have you heard about it?
Do you want to play along?

We are gonna get this party started April 6, 2018

https://www.facebook.com/groups/766311806913051/

You should join it!

I am a guest designer and get to blog and join in on the fun with Nancy Rink and Sarah Maxwell.
Karen Brandt O'Connor is also a guest designer.

There are kits available (it's not too late).
http://www.needleinahayesstack.biz/shop/Fabric/Fabric/p/Designer-Duo-QAL-Fabric-Kit-PREORDER-x32461950.htm

I hear there will be blogs chocked full of info, 
demos and prizes!

I can't wait for the fun to begin!

Blog at you later,
Tiffany